Using the Hypno 3: Modulation Mode

When you press and hold buttons A or C, they allow you to further change the attributes of the two respective video oscillators. That is by pressing and holding A, you affect the first oscillator, while pressing and holding C affects the second oscillator. The manual for the Hypno calls this Shape Pages, but I will call this Mod Mode, as the settings that are accessed through this method essentially modulate the oscillator. For those of you who are new to the concept of modulation, we can simplify the concept for the Hypno, and state that modulation makes the images move.

When pressing and holding A or C, the functions mirror each other. For instance, when you hold down button A, slider A controls the scrolling of the shape. However, when you hold down button C, you would now using slider B to do the same affect. Thus, when describing various functions, I will try to describe slider and dial positions in relationship to the button being held, while also putting the exact slider or dial in parenthesis in order to be clear.

So, as already stated, the slider on the same side of the button controls the scrolling of the shape (slider A for button A, slider B for button C). The dial that is closest to the button (dial A for button A, dial D for button C) changes the speed at which the shape rotates. The top dial on the same side as the button (dial B for button A, dial C for button C) controls the amount of modulation for polarization or for Y (vertical) scrolling. In the later case, the twelve o’clock position on the dial indicates no scrolling, while moving the dial to the left causes the shape to scroll down, while moving the dial to the right causes the shape to scroll up.

The the top dial on the opposite side as the button (dial C for button A, dial B for button C) controls the amount of fractal modulation. The dial on the opposite side of the button (dial D for button A, dial A for button C) controls the amount of fractal drift, or if fractal modulation is off, the amount of mirroring or repetition. The slider on the opposite side of the button (slider B for button A, slider A for button C), controls the amount of modulation sent the selected oscillator to the other oscillator (A to B or B to A). The top dial (E) sets the color saturation for the selected oscillator (ranging from white fully saturated). Finally, the lower dial (F) sets the hue offset from the root hue setting from performance mode.

As we get further into modulation, it is very possible to make settings in modulation mode that you find difficult to impossible to undo or un tangle. Rebooting the Hypno by turning it off and turning it back on again, can allow you to reset it, but often dealing with the lack of predictability is part of the process. That being said, if you want to feel more in control of the output, change the settings in modulation mode slowly and change only one setting at a time, while noticing the visual change that occurs with that setting change.

A silent video demonstration of most of the options in modulation mode on the Hypno.

Here’s a Sleepy Circuits quick guide describing how to control color using a combination of Performance and Modulation Modes . . .


video by Sleepy Circuits

Likewise, here’s a Sleepy Circuits quick guide showing how fractal modulation is achieved in Modulation Mode . . .


video by Sleepy Circuits

Using the Hypno 4: Feedback Modes / Feedback Modulation Mode

Using the Hypno 2: Performance Mode

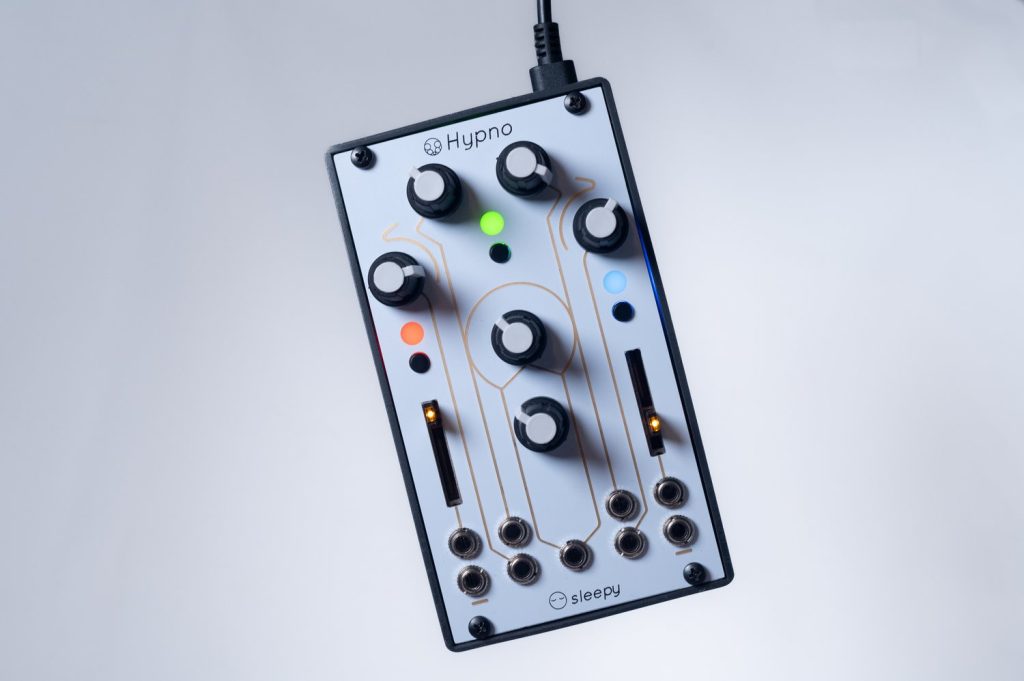
As previously stated, the face of the Hypno features two sliders, three buttons, and six dials. For convenience, through this manual, I will refer to the two sliders as A & B (left to right) and the three buttons as A, B, & C (left to right). For the dials I will refer to the four at the top as A, B, C, & D (left to right) and the two in the center as E & F (middle to bottom). The Hypno has several modes of operation that are accessed by holding down (or not holding down) buttons. I will refer to the mode where no buttons are being held down as performance mode.

image from Sleepy Circuits.

To get started with the Hypno, let’s not use any input, and just use it to generate video using its two video oscillators. The module is symmetrical, so the controls on the left (slider A, button A, and dials A & B) generally control the first oscillator, while the controls on the right (slider B, button C, and dials C & D) control the second oscillator. The controls in the middle (button B and dials E & F) generally control the module as a whole.

Buttons A & C set the shape for the two oscillators. Pressing the buttons cycles through the shapes, sine, tan, poly, circle / oval, fractal noise, and video input. These shapes are coded with the color of corresponding LED (red, green, yellow, blue, pink, and teal). The last setting, teal / video input, is only accessible when a USB video input is plugged in. We’ll deal with the video input shape in a later tutorial. While the manufacturer refers to the first two shapes as sine and tan, they both are essentially lines. The polygon shape is a septagon by default.

RedSine
GreenTan
YellowPolygon
BlueCircle / Oval
PinkFractal Noise
TealVideo Input


A silent video demonstration of the five basic shapes in Hypno.

Sliders A & B set what the manufacturer calls frequency, but perhaps it is better understood as a zoom function. The zoom feature can be very useful when you are first getting used to the Hypno. Zooming in completely, that is pulling the slider all the way to the bottom can make a video layer disappear, so you can better see the effect of each control. Dials A & D rotate the selected shapes, and dials B & C control the polarization of the shapes. When polarization is low, the shapes appear normal. As polarization increases, the shapes start to bend until they completely wrap around, forming concentric circles. However, it should be noted that for the polygon, circle / oval, and video input shapes, dials B & C function as Y (vertical) offsets.

A silent video demonstration of the zoom, rotate and polarization / y offset controls on the five basic shapes.

The remaining two dials (E & F) control both oscillators. The former controls the gain of each shape, with the center position resulting in a black out of both layers. The latter dial controls affects the colors of the two layers, shifting the relationship between the hues of the two layers. At this point you should understand the basic shapes and controls in performance mode for the Hypno. Notice however, with the controls we have introduced thus far, there is no movement on its own. That is the shapes only change when a control (button, slider, or dial) is changed.

Here is the Sleepy Circuits quick guide for performance mode (they call it shape pages) . . .


video by Sleepy Circuits

Using the Hypno 3: Modulation Mode

Using the Hypno 1: Connections

The Sleepy Circuits Hypno is a video synthesizer that can generate video using two video oscillators that generate a variety of shapes shapes. Each video oscillator can be manipulated using a series of buttons, sliders, and dials. The Hypno can also accept video input via USB for each of the two video oscillators, allowing it to manipulate video (live or pre-recorded) in real time. Sleepy Circuits has a lot of great info about how to use the Hypno spread between the manufacturer’s website and their YouTube channel. However, in my opinion, they lack a single resource that functions like a full manual taking you through how to use the Hypno from beginning to end. I hope to do this in a few blog entries.

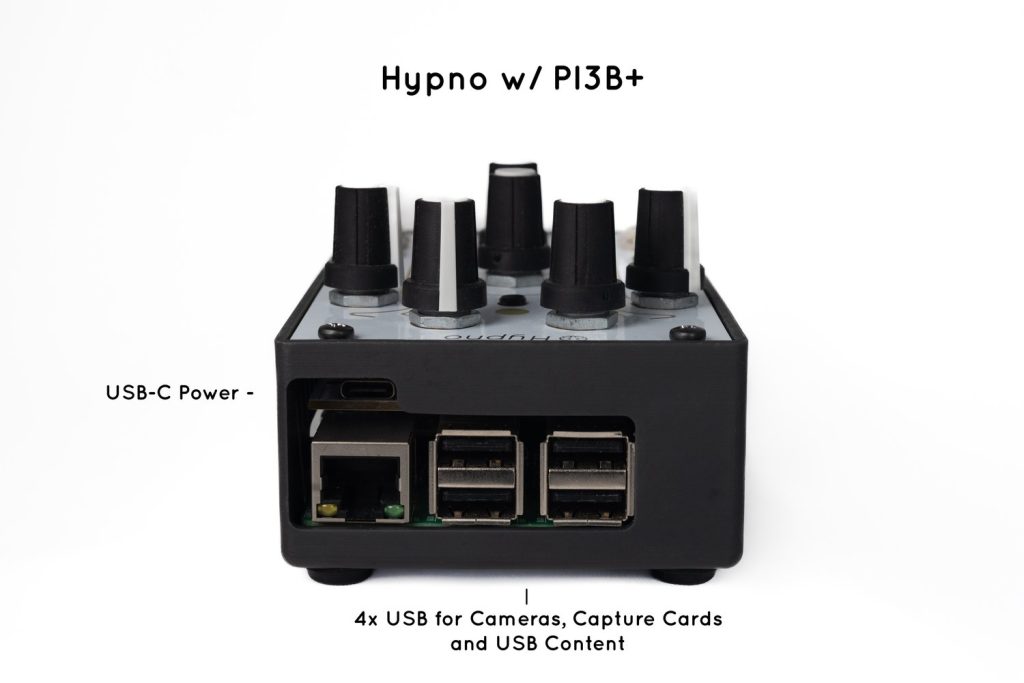
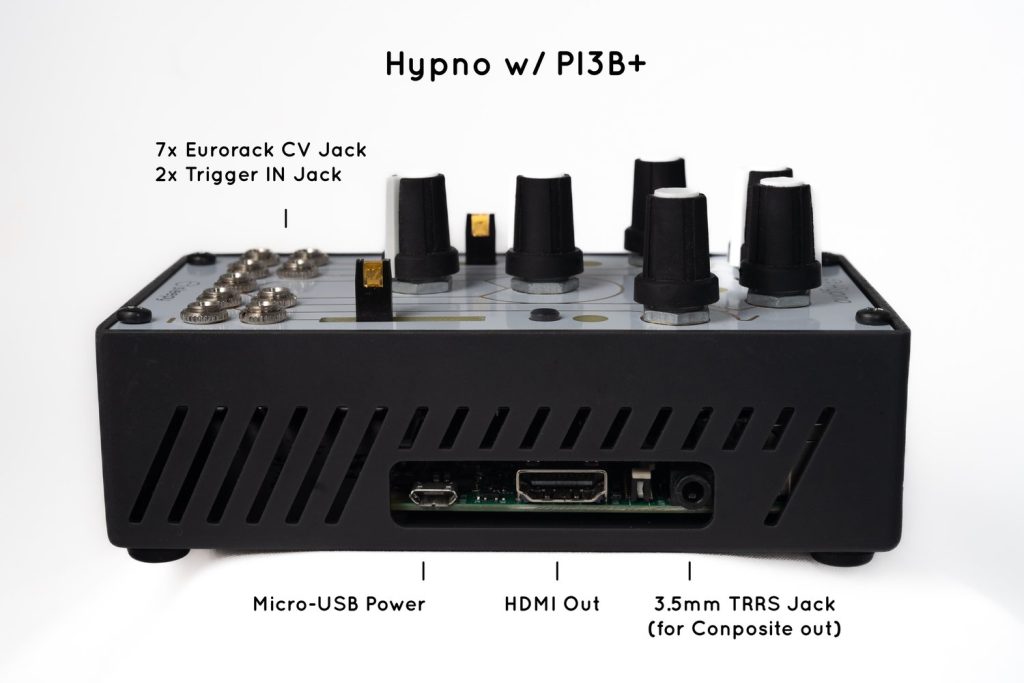
Let’s start off by looking at inputs and outputs. The back face of the Hypno features four USB inputs that can be used for connecting cameras, capture cards, USB drives, and MIDI instruments. The right hand side of the module features an HDMI out, a composite out, and a micro USB port which is used to power the unit. The Hypno is a bit picky in terms of the order you plug things in. You should always plug in the HDMI out before plugging in the power. When you plug in the power, you will notice that the Hypno goes through a boot up process. Note that there is no power switch, so turning the unit on and off is done through plugging it in and unplugging it. If you are going to use any USB input, you would plug that in third, after plugging in the power.

image from Sleepy Circuits.

image from Sleepy Circuits.

The face of the Hypno features two sliders, three buttons, and six dials. Since each of these fulfills several functions, none of them are labelled. The face also has nine 3.5mm TS sockets for use with Eurorack and Eurorack compatible gear. These nine ports can be used to control / automate the two sliders, two of the three buttons, and five of the six dials. We’ll spend more time dealing with this in a future post. However, if you plan on using these Eurorack connections, you will want to connect them after connecting power.

image from Sleepy Circuits.

At this point, you should be able to correctly connect the Hypno to inputs, outputs, and power in the correct order.

Using the Hypno 2: Performance Mode