Spring break has allowed me to catch up on work that I had back burnered a bit. I finished my draft of a Hypno manual . . .
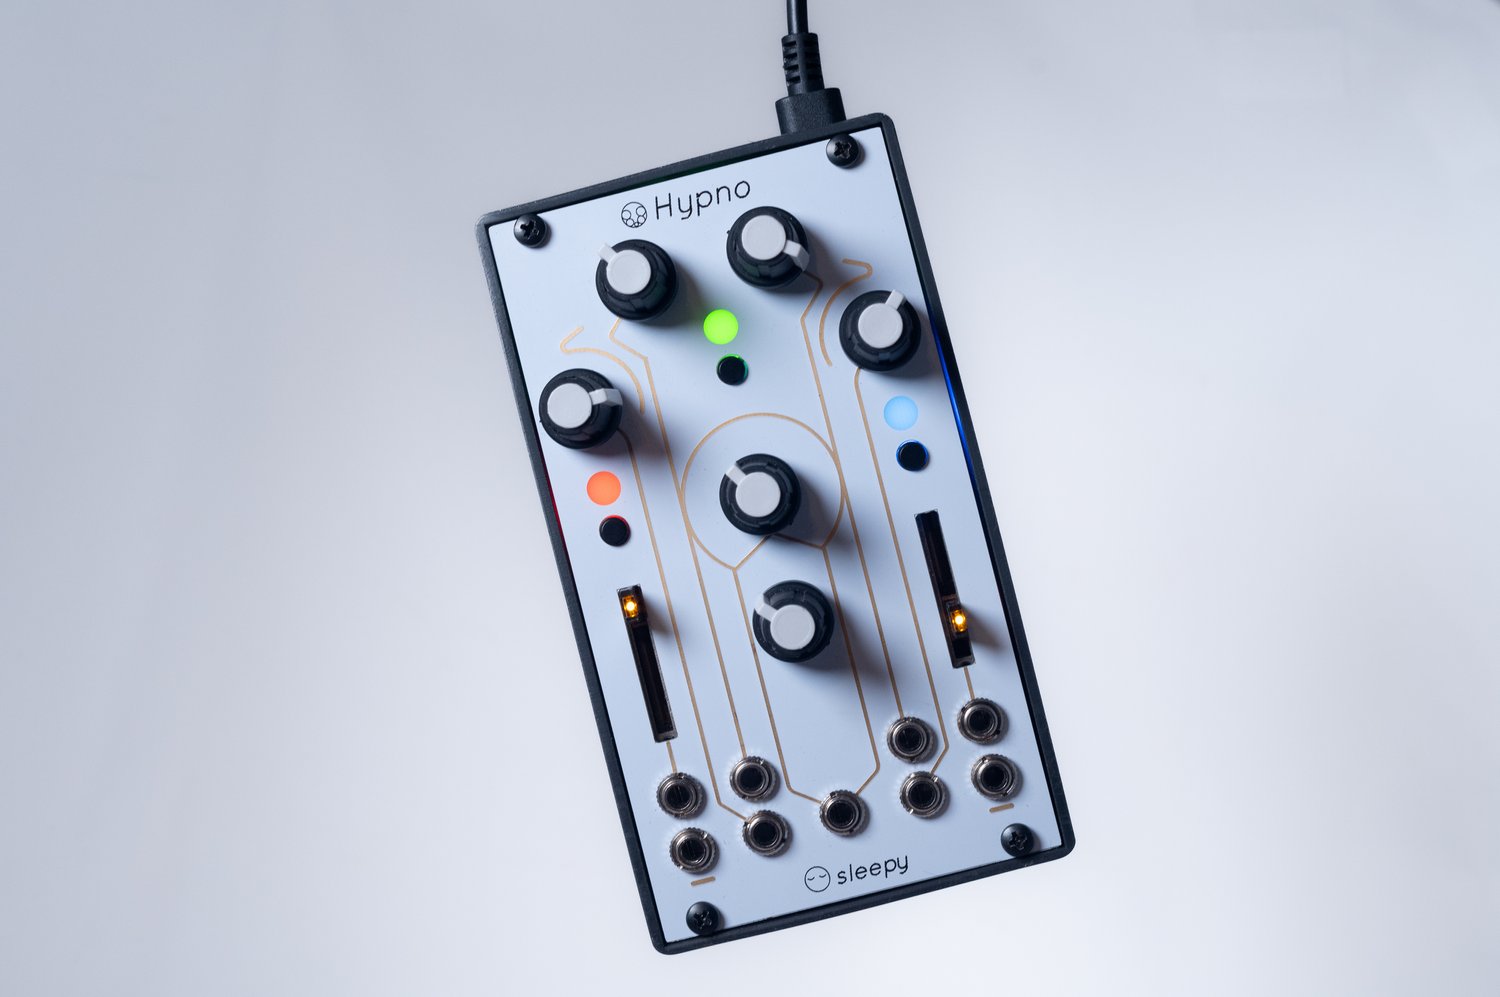
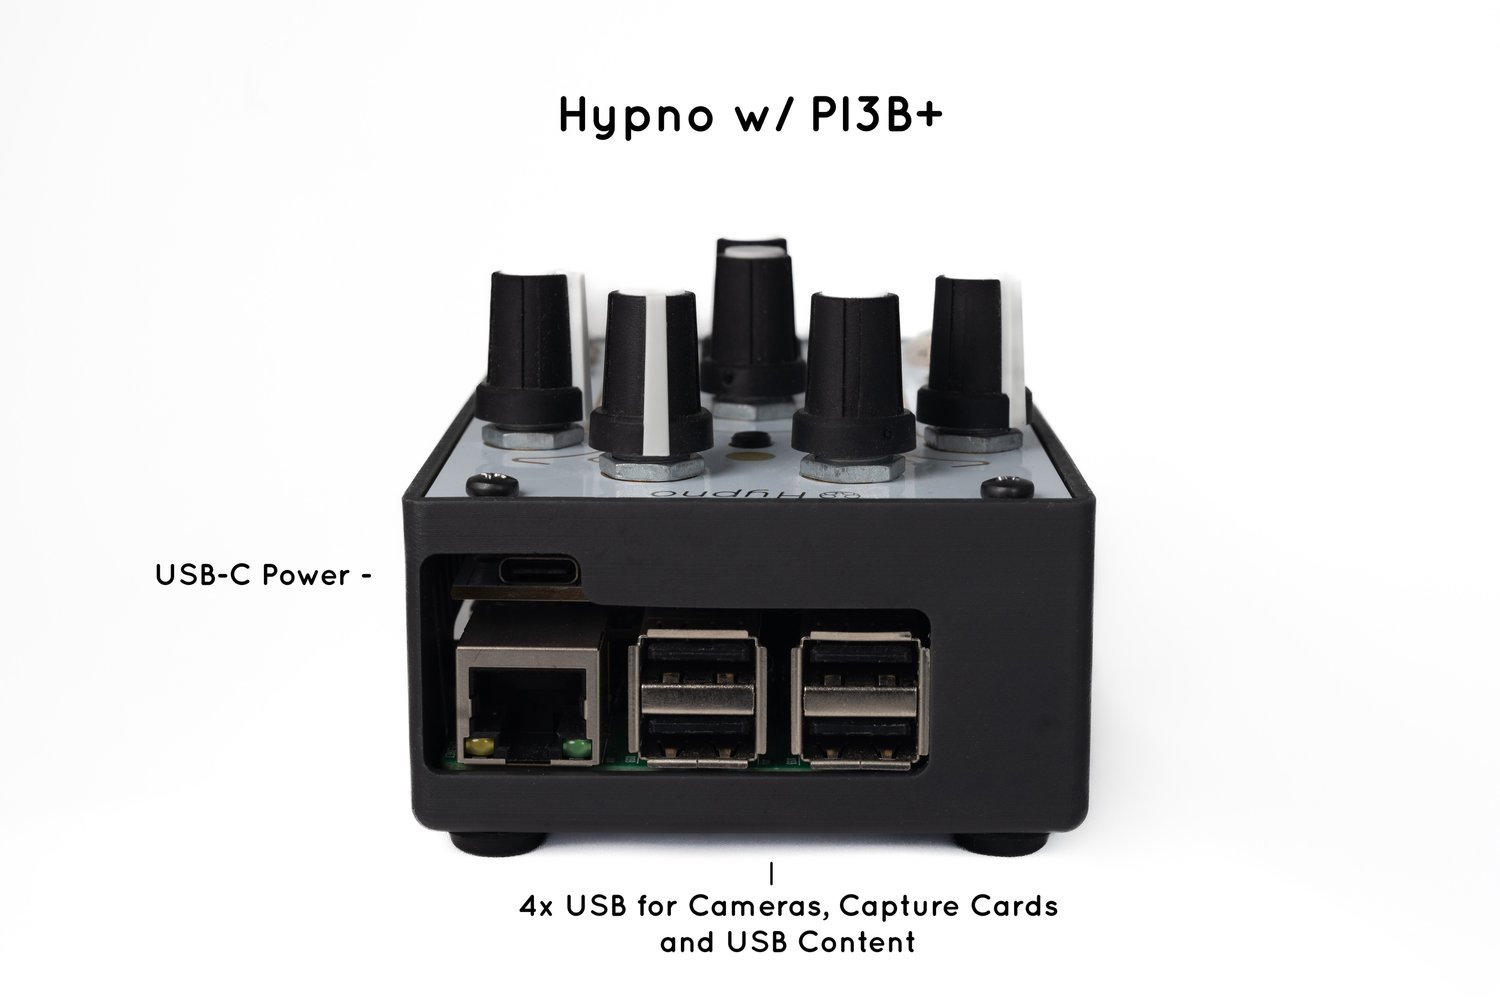
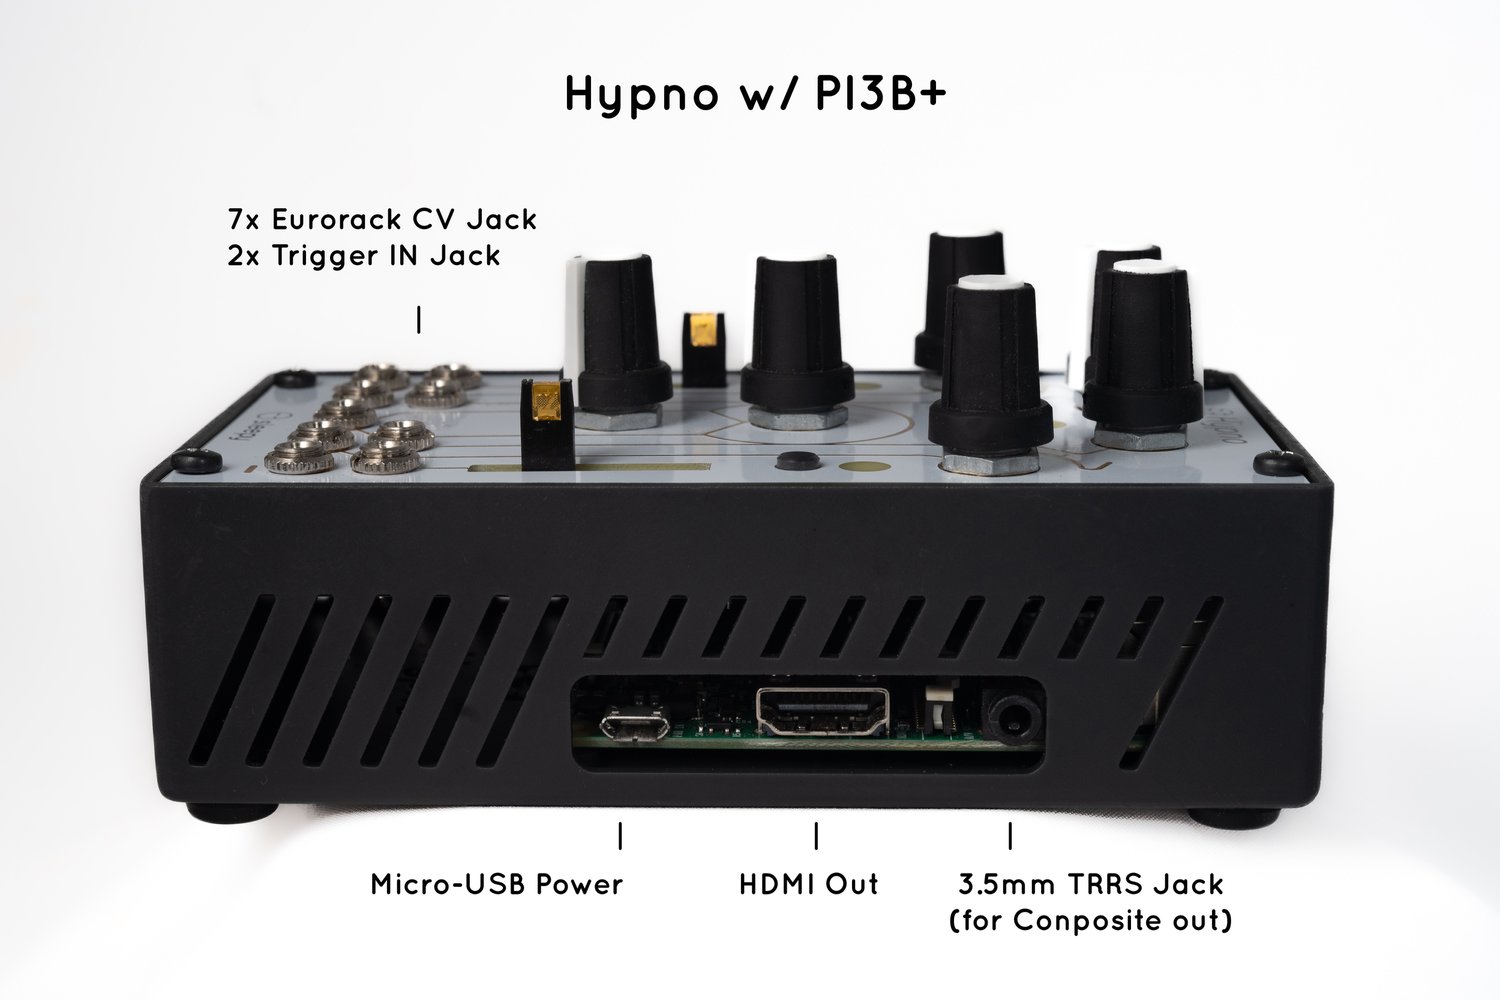
Using the Hypno 1: Connections
Using the Hypno 2: Performance Mode
Using the Hypno 3: Modulation Mode
Using the Hypno 4: Feedback Modes / Feedback Modulation Mode
Using the Hypno 5: Using Input Shapes
Using the Hypno 6: Advanced Mode
Accordingly, I also feel like I have a good enough understanding of the Hypno to start creating videos. First, some context. For the last 75 years, music and music marketing has been increasingly reliant upon visual material. Due to American Bandstand (1952-1989), to Top of the Pops (1964-2006), to MTV (1981-), to YouTube (2005-), and TikTok (2016-), musicians and musical groups have been under increasing pressure to incorporate the visual into their music making routines.
This can be a problem for the independent musician. Creating visual content takes time, expertise, and often money. The more time a musician spends creating visual content, the less time they spend making music. Video synthesis is one potential solution to such a problem. Video synthesis typically takes place in real time, thus, creating a video, in theory, could take only the amount of time it takes to playback the music it will be accompanying. Furthermore, since video synthesis is based upon concepts of sound synthesis and to a lesser extent, performance, musicians are typically well versed in improvisation, and may also have an understanding of sound synthesis that gives them a basic level of expertise that can be built upon.
I recently released a recording of an improvisation based upon “The Star-Spangled Banner.” To create a video for the piece, I used public domain footage from four of Edison Studios films., including Raising Old Glory Over Morro Castle (1898), Statue of Liberty (1898), Parade of Marines (1898), and Morning Colors on US Cruiser Raleigh (1899). I used the resulting video file on both of Hypno’s video oscillators, and recorded the video output from a series of improvisations. One issue I had is that if I bumped the HDMI cable, it would momentarily break the connection between the Hypno and the HDMI to USB capture card I was using, causing the video recording to stop.
Ultimately I was able to record five video improvisations, lasting :43, 1:25, 1:35, 4:18, and 8:25. totalling 16:26. My recording of “The Star-Spangled Banner” lasts 11:47, so I cut each of the five videos into phrases. I shortened the longest phrases to be between 40 and 41 seconds long. Then I arranged the longest phrases from most identifiable to most distorted. Then I interspersed the shorter phrases arranging them from most distorted to most identifiable, resulting in the video below.